A gallery wall is one of the surest ways to add personality to your home. The fun thing about this artsy feature wall is that it can evolve with you. If your collection is small, it can grow, piece-by-piece, over time. If you get bored with what you’ve hung up, you can just replace it with a new-found painting, print, or even an artifact like a tribal mask! Anything goes with a gallery wall. All that you have to worry about, is getting the configuration right.
Here are 7 inspiring gallery wall styles to get you excited about creating your own!
#1 The Grid
For the Perfectionist

Image by:Dinz
Keep your composition neat and organized with clear, equal spacing between each art piece. This style is ideal when pieces are similar in shape, size and aesthetic.
If the precision of a grid style is too formal for you, use alternative framing, like clipboards to add a quirky element to your gallery. Alternatively, you can arrange the artwork in a row rather than square, keeping the balance by using similar shapes and uniform spacing.
#2 All Strung Up
For the Modern Traditionalist

Image by: One Kings Lane
If your home happens to have picture rail mouldings, you’re in luck! You’ll save time and effort by hanging artwork from pre-existing fixtures. Choose reinforced twine or copper wire to suspend modern artwork for added visual appeal.
Don’t have picture rails? Improvise with a DIY metal rail to create an impressive industrial touch to your artsy wall.
#3 On a Line
For the Connoisseur

Image by:House of Valentina
Arrange your collection to rest on an invisible horizontal line, creating a sense of formality and order to a predominantly free-form composition. The abruptness of the line emphasizes the furniture or décor underneath it as well, so this is a great way to highlight a designer sofa or beautiful styling.
#4 Diagonal lines
For the Experimental

Image by: Southern Living
An angled approach is perfect for odd nooks and crannies, especially those associated with staircases! When you want to experiment with your feature wall and create a bold focal, diagonal lines are the way to go. Try a couple of layouts to ensure that you’re happy with the result before committing nail to wall. And for a fun and quirky focal, try a triangular composition and incorporate a round shape, like a mirror.
#5 No Nails Needed
For the Quick Fix

Image by: Transitoinicial
There are so many alternatives to nails when it comes to displaying your artwork. Large pieces can simply lean on the wall, and small pieces can be stuck to the wall using reinforced double-sided tape. But our favourite (not to mention easiest!) alternative is placing artwork on existing shelves. Simple and effective!
#6 The Full Wall
For the Collector

Image by: Style and Create
This is the feature wall for the individual who has built up a sizeable art collection and wants to showcase it all. Avoid overcrowding your wall and experiment with layouts that are forgiving to any possible change in composition.
The perk of using a large wall is that you can add pops of color and mixed media without worrying about the composition too much. You can also try this on a distressed wall to add some texture and interest.
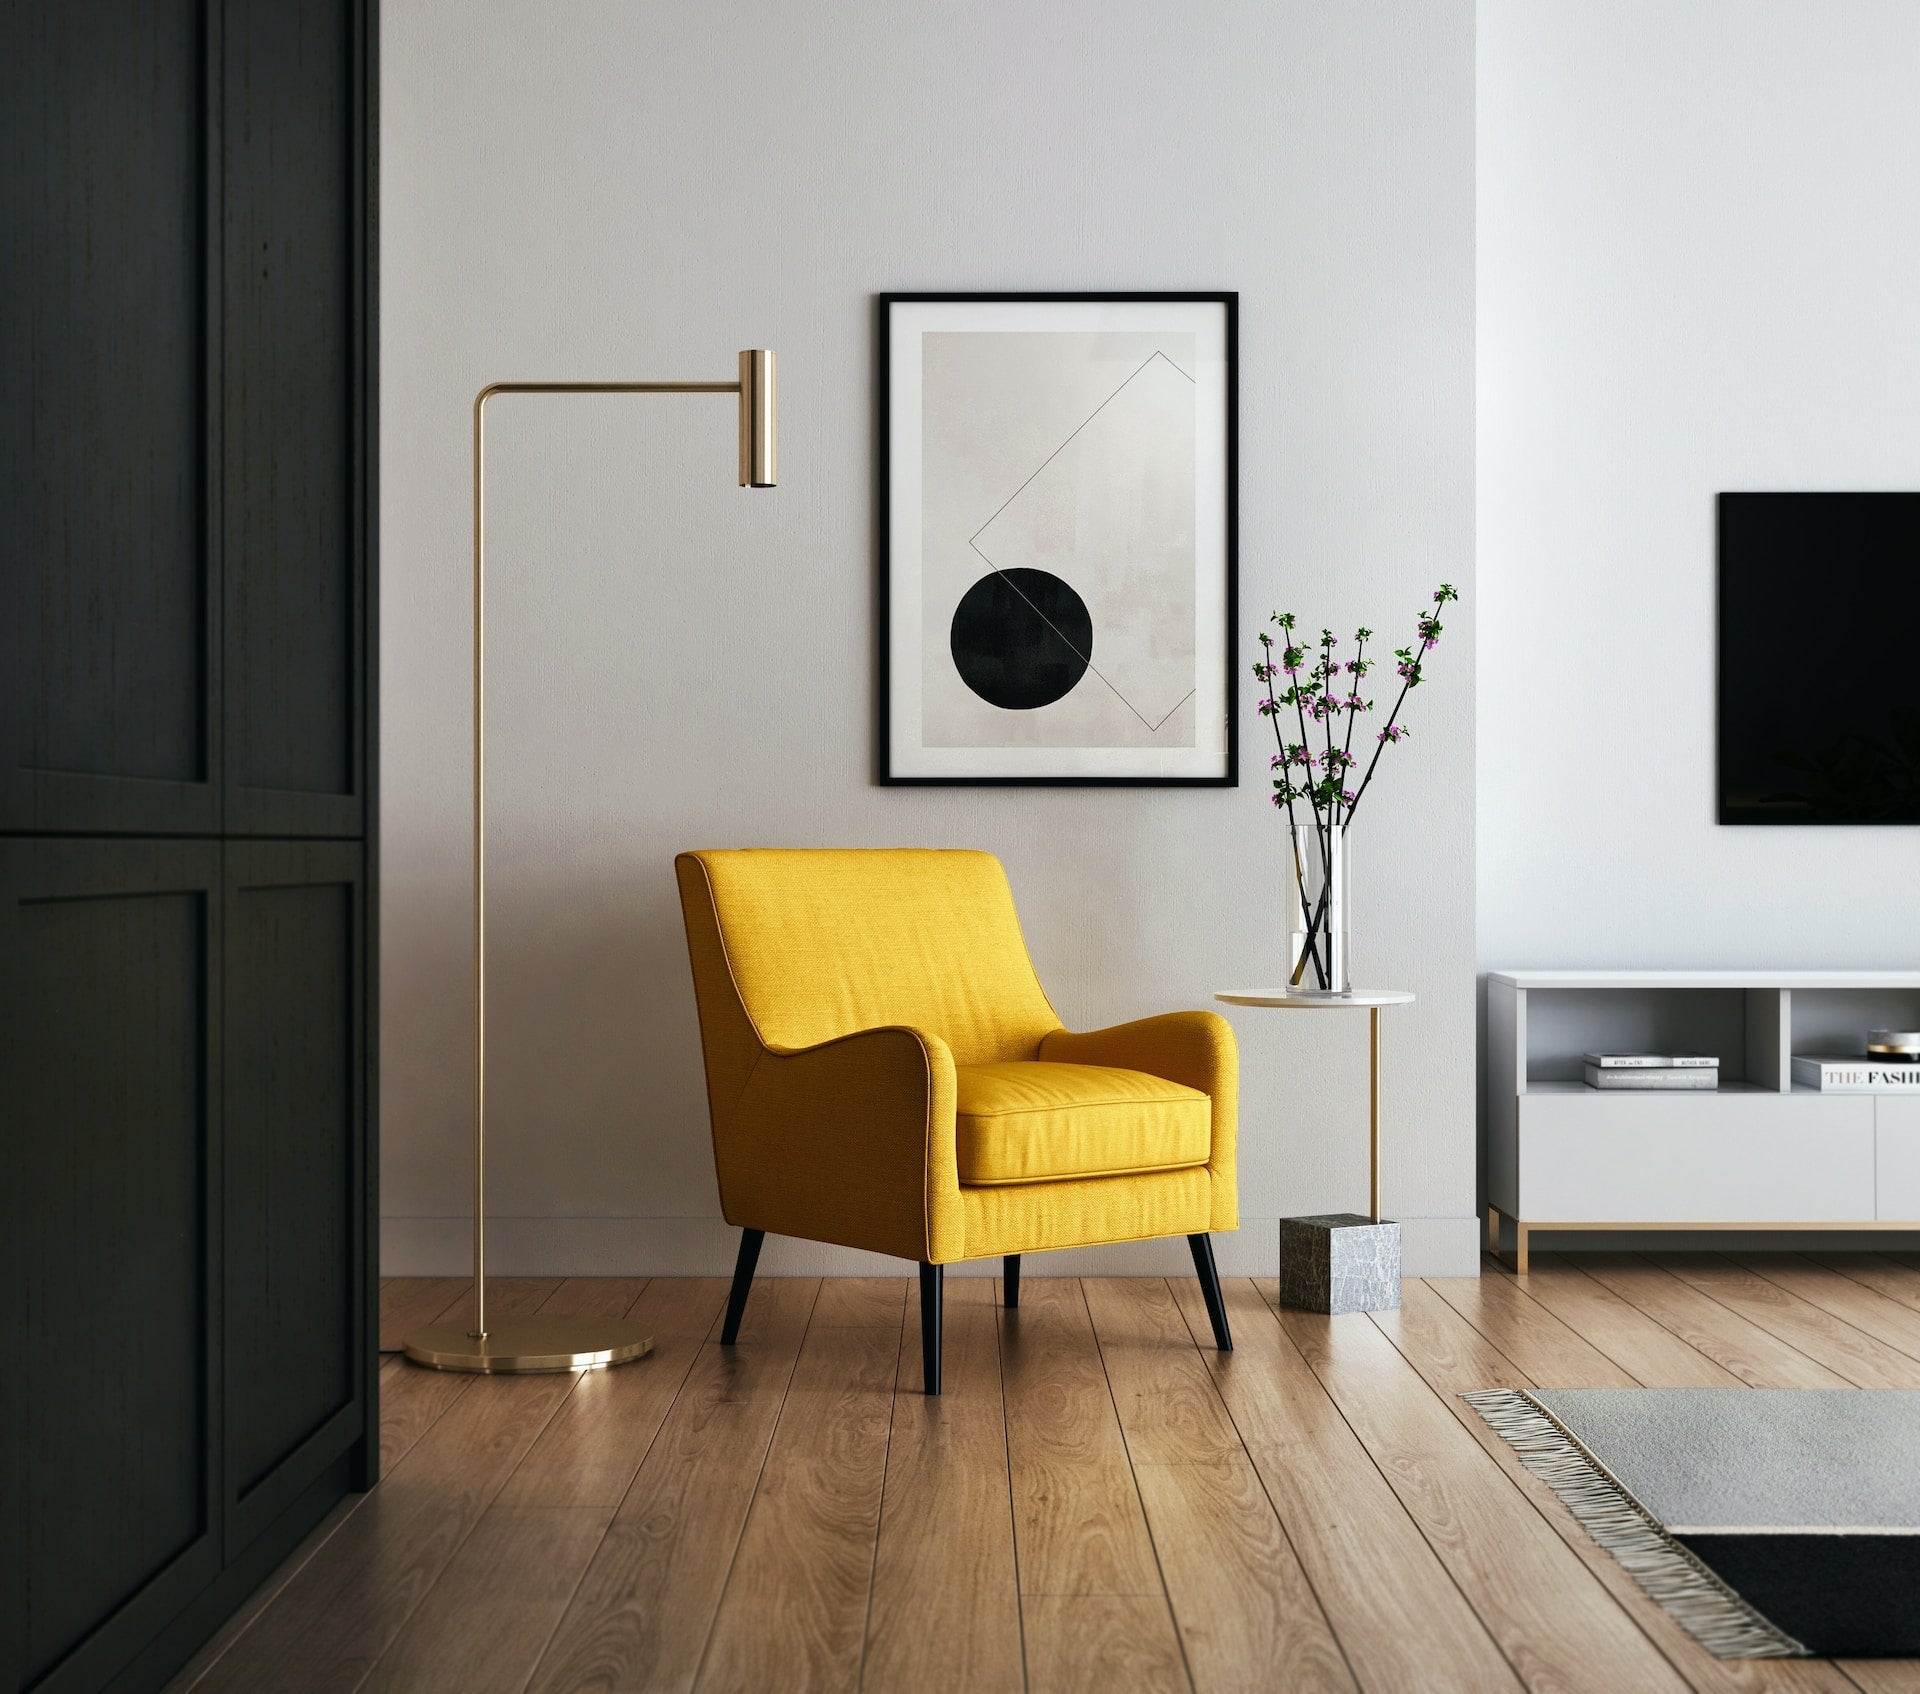
#7 Clustered
For the Integrator

Image by: The Register
Cluster your chosen art pieces around furniture to create a seamless focal. Integrating your gallery wall with the furniture around it creates a cozy atmosphere. Here the whole room becomes the feature.
Step-By-Step Guide to Creating Your Gallery Wall:
-
Pick a common theme, color, black & white, or style for your collection.
-
Gather all paintings, photographs and other objects (such as mirrors or artifacts that you want to add to your gallery.
-
Choose a gallery wall style.
-
Get the configuration right by either laying the artwork on the floor and moving them around until you’re happy with the layout.
-
Use craft or newspaper to make templates of each of the artworks.
-
Create a mock-up by sticking the templates to the wall with painter’s tape
-
Once you’re happy with the mock-up, add the fixings to the wall.
-
Hang your personalized collection.
-
Done! Enjoy your stunning focal wall!
To add to your collection and your gallery wall, browse our original artwork and fine art prints.
Feature Image by Homepolish
Leave a comment (all fields required)
Comments will be approved before showing up.